Windows Single Sign On
Windows Single Sign On
The Basic Steps
Verify that the Windows user is connected to a Windows domain .
Configure an Authentication Profile .
Close and Reopen browser.
Problems? Follow the Single Signon Troubleshooting Checklist.
Introduction
Enfold Server makes it possible to enable single sign on (SSO) for logged in Windows users who are members of a domain. That means that a Windows user inside a company's Intranet can create/edit Plone content without having to sign on every time. Most content-management systems use cookie-based authentication; that means more passwords to remember and separate user accounts to administer. Enfold Server lets users authenticate using NTLM authentication (the protocol used by Windows XP/Vista to authenticate users on a company's domain). Once configured correctly, the browser will authenticate using the user's credentials as a member of the domain.
Doing this offers advantages for the company. First, it enhances the user experience for content creators. Second, by reducing the use of passwords on the Intranet, it offers security advantages. Finally, it allows Windows administrators to manage Plone users from one central location (without having to maintain users and groups in two separate places).
- NTLM Defined:
- NTLM is a Microsoft user authentication protocol. In the context of Enfold Server, NTLM authentication refers to the ability of the user's web browser to use the same credentials for signing onto the website as he or she did for logging onto the Windows user domain. Browsers such as Internet Explorer 7 and Firefox both have the ability to use these NTLM user credentials to automatically sign on to a website (See Test in Browser). If you do not use NTLM authentication within a Windows domain, that means you simply will need to rely on browser cookies to sign on to the website.
NTLM authentication applies only when you are using Active Directory on a Windows domain. It is not for all situations. (See alternate scenarios for user authentication). Also, there is a known issue about how NTLM conflicts with a PlonePAS variable. (See Known Issues).
Several caveats apply if your Active Directory users are authenticating onto IIS/Plone.
- You need to use an NTLM-aware browser. Generally on Windows XP, NTLM works on Internet Explorer and can work with minor tweaks on Firefox. (Read more).
- You need to configure an appropriate Authentication Profile for your site.
- If using an IIS site, you must enable Integrated Windows authentication and disable Allow Anonymous Login on the Directory Security tab for the IIS site.
- The server user installing/running Enfold Server needs the ability to create/remove users inside Active Directory or LDAP directory service for the Windows domain.
See also: Demo Screencast on the Enfold website at http://www.enfoldsystems.com/software/server/demos
Choose Authentication Profile on Plone control panel
See also: how to avoid being locked out of your Plone site and troubleshooting browser issues .
The first step to setting up single sign on is to choose an authentication profile appropriate for your situation. An authentication profile is a setting to determine how Enfold Server authenticates all users to a single Plone site run by Enfold Server.
- Before you can configure single sign on of users for Enfold Server, you should be able to answer these questions:
- Are you using Active Directory to authenticate users to the Windows domain? Or another LDAP directory service?
- Are you installing a proxy server (such as Enfold Proxy ) with Enfold Server? Is it on the same machine or a different machine?
- Do you want to map existing AD groups to different roles in Plone?
Login as the Zope/Plone admin user. Select Site Setup.
Do you see an option for Authentication Profiles? If not, then you need to install the Plasma product on the Add/Remove Products page. (Plasma is a custom Enfold product included in Enfold Server that lets you select and configure Windows authentication profiles).
Select Authentication Profiles and choose the appropriate option.
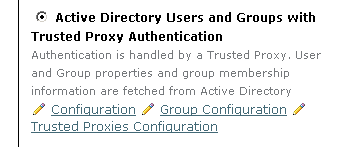
- If you would like to use Active Directory groups to designate users' Enfold Server roles, choose a profile that begins with Active Directory Users and Groups. (Read more about configuring AD groups for Plone) Otherwise, choose a profile without Groups in its name.
- If you want to use the single sign-on feature and will be using Enfold Proxy, choose a profile with Trusted Proxy Authentication in the name. (Read more about Trusted Proxy Authentication)
- If you want to use the single sign-on feature and will not be using a proxy server, choose a profile ending with Integrated Windows Security in the name.
- If you do not want to use the single sign-on feature, or if you will be using a third-party proxy server, choose a profile ending with the words Cookie Authentication.
The Authentication Profile configuration screen has a button on the bottom for clearing authentication cache. Previous versions of Enfold Server required that you push this button when updating or changing authentication profiles. However, now this is no longer necessary.
Tip: when modifying authentication defaults in Plone or Zope, it is safest to open the Plone site in the right panel of the Zope Management Interface (ZMI). Authentication Profiles do not apply inside the ZMI.
Configure an Authentication Profile
After you select an authentication profile and press update, you will return to the same page. But this time, you will see links to configuration menus (they appear with a pen icon). When you click them, you will be able to configure your Plone settings so that they work with the Authentication Profile.
Clicking on any of the configuration links will take you to the appropriate place in the ZMI. After saving your changes, you may have to return to your Plone control panel (i.e., http://qehouston.local/plone_control_panel ).
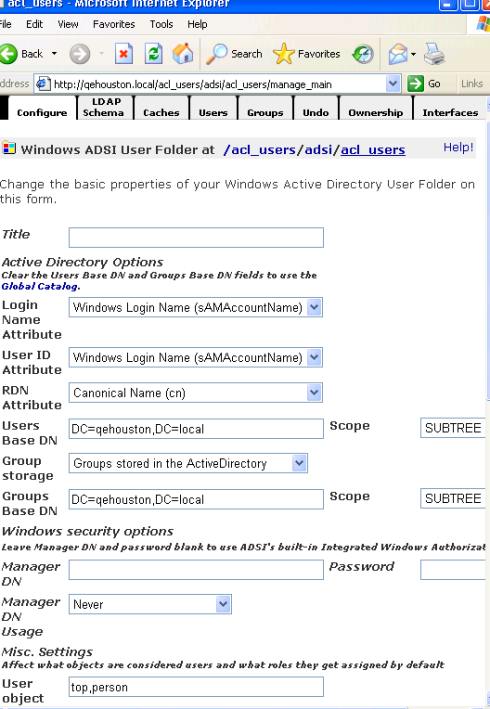
Configure Active Directory
When you choose an authentication profile with "Active Directory" in the name, you will be presented with a configuration link. Normally, these values will be auto-populated if you initially configured your Service User to be part of your Intranet domain. (See Server Security ). Check to be sure Users Base DN is populated with values corresponding to the domain name. (In the example below, the company's domain is qehouston.local).
Set up Enfold Proxy (if you are using it)
Enfold Proxy is a separate commercial product produced by Enfold that proxies Plone sites to Internet hosts and offers caching capability. (Read more information about Enfold Proxy).
Enfold Proxy is compatible with single sign on, but before it can work, you need to do these things:
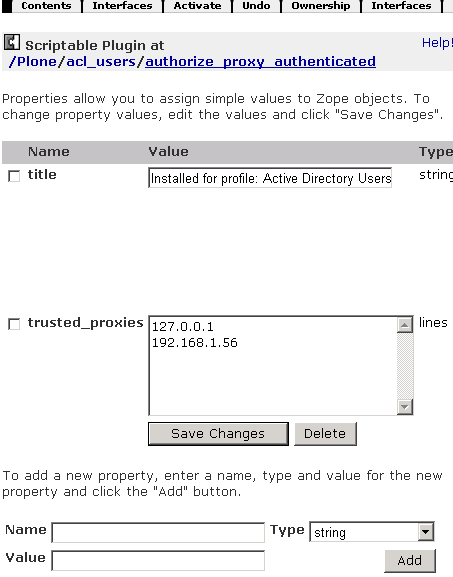
Choose one of the authentication profiles for Trusted Proxy Authentication. (You may need to press the clear authentication cache button).
Select Trusted Proxy Configuration option underneath the authentication profile. If the IP address of IIS/Enfold Proxy is not listed, be sure to add it. In the example below, 192.168.1.56 is the IP address for the machine with IIS and Enfold Proxy.
In addition, you need to verify that your IIS permissions are correct.
- Right click on the IIS site you are using.
- Select Authentication Methods.
- Verify two things:
- Enable Anonymous Access is not checked. (This is incompatible with NTLM authentication).
- Integrated Windows Authentication is checked.
Test in Browser
Note: when testing authentication, it is important to close all open browsers after a change to authentication profiles has been made.
Internet Explorer and Firefox both support NTLM authentication, but it may be necessary to enable it.
- Internet Explorer: Early versions always enabled NTLM authentication. Recent versions have NTLM authentication enabled only for computers in the "Intranet" Zone. This option can be found via Tools > Internet Options > Security > Custom Level > User Authentication > Logon. (It is near the bottom). The option Automatic Logon only in Intranet Zone should be checked. Please see the Internet Explorer documentation for more details.
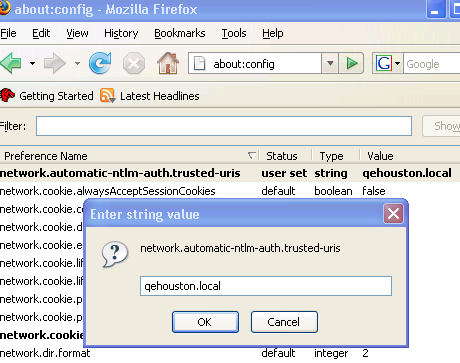
- Firefox: All URLs which support NTLM must explicitly be added to the network.automatic-ntlm-auth.trusted-uris preference. This option is not exposed via the Firefox UI, but can be found in about:config. Please see the Firefox documentation for more details.
For all other browsers, please view the documentation for that product. As mentioned above, the client must be currently logged onto the same domain as the server before NTLM authentication will take place.
These steps, when performed correctly, let domain users sign on to the website using their domain credentials. If you are having problems, follow the Single Signon Troubleshooting Checklist.