Quick Start
Online Demo
If you visit http://www.enfoldsystems.com/assets/demos/create-a-collection.swf, you can view a 2 minute animated screencast about editing documents with Enfold Desktop. (It uses a previous version, but is still relevant).
When you install Enfold Desktop, you can install an online demo to try it out. URL is http://us.demo.enfoldsystems.com/Members/demo, username is "demo", and password is "12345".
5 Minute Tutorial
Requirements: Read the technical requirements and make sure you have login information (Site URL, username, password).
-
Install Enfold Desktop from the Enfold website.
-
Start the program. Start --> Programs --> Enfold Desktop --> Enfold Desktop
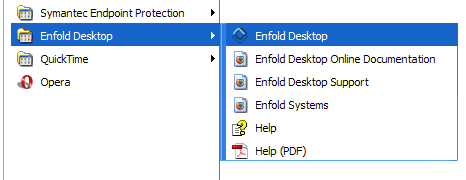
After you click on Enfold Desktop, Windows Explorer will open.
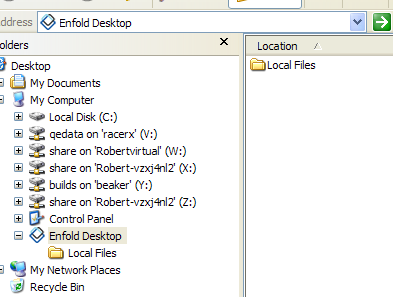
Above you can see that Enfold Desktop appears as if it were another drive under your computer. Inside is just a single directory Local and perhaps a demo server.
-
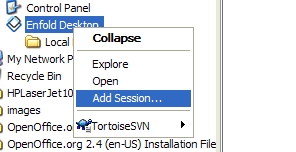
Add a Session. You won't be able to do anything until you add a session. Click on the Enfold Desktop icon and right-click.
-
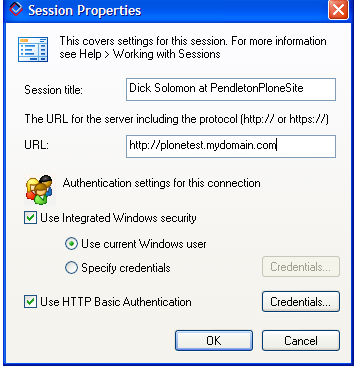
Enter your site URL and a session name. Give the session a meaningful name (Ex: Dick Solomon at PendletonPlonesite). Read more about how to create sessions.
'
-
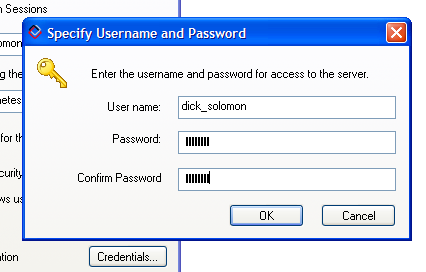
Authentication. Click on the bottom button for Credentials by HTTP Basic Authentication. (Generally, leave Use Integrated Windows Security checked; it doesn't hurt. Do not choose the option for Specify Credentials unless your server is using Windows Single sign-on with Enfold Server. (Your administrator would know this).
-
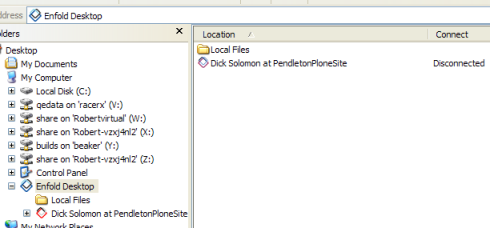
Now you have configured your session. You will see a new icon for your session on the right side, along with your session name.
-
But wait! It says disconnected. Connect to your session by double-clicking the session icon. If all goes well, you will see something like this.

Note: depending on permissions for your account, you might not be able to see all the directories or files. That's not unusual.
-
Make sure you are using Details view in Windows Explorer. When you do this, you will see not only icons inside folders, but also columns listing the Local State, Workflow State and Lock Status.
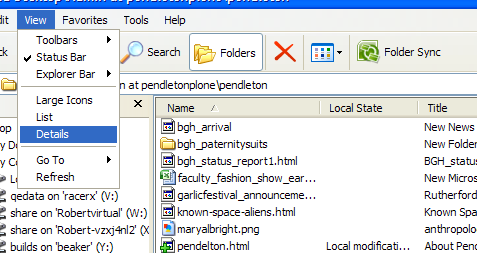
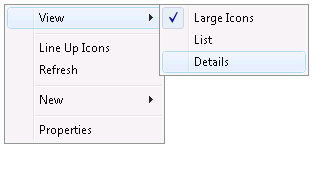
To go to Details view in Windows Vista (32 bit version), you need to right-click anywhere inside a folder and select View --> Details. (Read more about Vista and Enfold Desktop).
-
Now we will create and edit a Plone document. (This is equivalent to adding a page content type on the Plone site). Click twice into a directory you have write access to. Right-click anywhere inside the folder and select New Document.
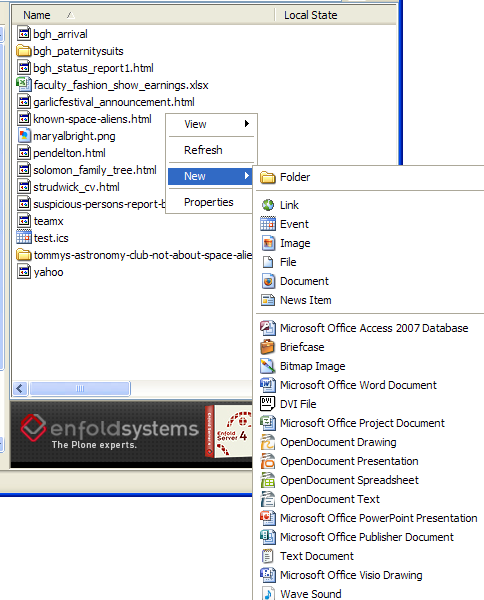
-
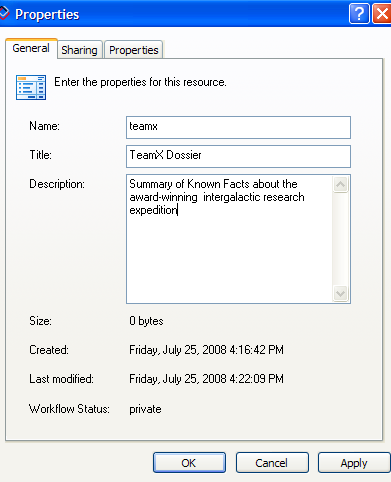
A file icon will appear inside the folder. Right click on it, choose Properties and fill in the metadata. (Read more about editing item properties). Press OK.
-
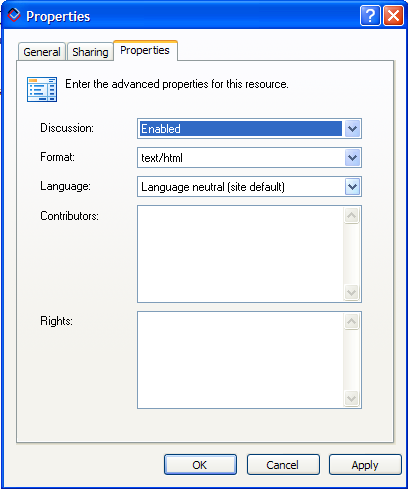
For this Plone documents we need to enable comments. That will allow logged in users to make add comments after the document has been published.
-
Now right-click the item and choose the Edit action. It will open up the Plone item in your editor of choice. (Read more about specifying or changing your preferred editor).
-
Edit it inside your preferred editor or application. (Read some things to know when editing HTML with Enfold Desktop). Save your document in your editor.
-
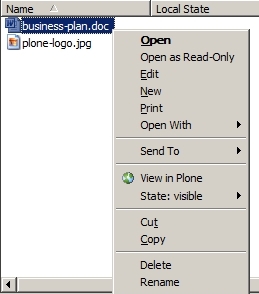
To check in the document, switch to the Enfold Desktop folder in Windows Explorer for your directory. Right click on the item and choose Check in.
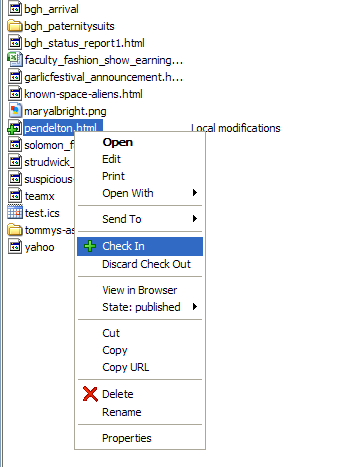
-
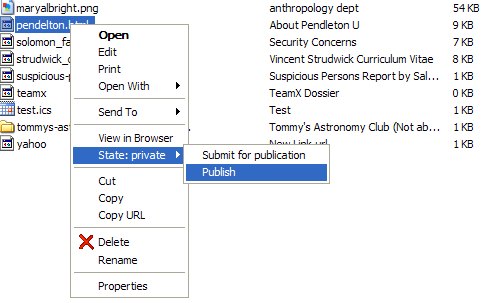
If this is a new document, the workflow state will say Private (and Local State will no longer say "Local modifications"). Now, move the document to the next state by right-clicking and selecting State-private --> Publish or Submit for Publication. (This varies according to your user permissions). Read more about changing a document's state. After it is published, the Locked message will disappear in Explorer for this document and the Local state will be empty.
-
To check whether something has been published, right-click on the item and choose View in browser. This will open up the item in your default web browser. Hint: It is useful to keep two different kinds of browsers open: one for viewing the doc as a logged in user, and one for viewing it as an anonymous user. (If the document is in Private state, you can still view it in browser even though the document itself will not be public--again, this varies according to the workflow set up by your administrator).
This covers the basic steps for editing a simple document for Enfold Desktop. The steps for uploading files are similar but not identical to that of uploading or moving files with Enfold Desktop. Generally, "files" will not have workflow states, so they will be published only if the parent folder is public; no further action is needed. Read more about uploading files.